(2019年11月18日)
■使用ソフト
・Unity Hub 2.1.3
・Unity 2019.2.11f1
・Visual Studio Community 2019
■言語
・C#
■手順
1.前回作成したプロジェクトを開く
2.PNGファイルを用意する(tex.png 128×128)
3.Assetsを右クリック→作成→フォルダー
4.Resourcesという名前のフォルダを作る
5.Resourcesフォルダの中にPNGファイルを入れる
6.C#スクリプトをダブルクリックしてVisual Studioを開く
7.コードを以下のとおり変更する
using System.Collections;
using System.Collections.Generic;
using UnityEngine;
public class NewBehaviourScript : MonoBehaviour
{
Vector3 startPos;//初期位置
int iTexNum = 0;
Texture texture1;
Renderer myRenderer;
// Start is called before the first frame update
void Start()
{
startPos = transform.position;//初期位置を格納
texture1 = (Texture)Resources.Load("tex");//テクスチャのロード
myRenderer = GetComponent<Renderer>();
}
// Update is called once per frame
void Update()
{
//マウス入力
if (Input.GetMouseButton(0))//左ボタンを押している間
{
Vector3 vecPos = Input.mousePosition;
Ray ray = Camera.main.ScreenPointToRay(vecPos);
if (Physics.Raycast(ray, out RaycastHit hit, 100))
{
if (hit.collider.name == "Cube")
{
GetComponent<Rigidbody>().AddForce(0, 50, 0);
}
}
}
if (Input.GetMouseButtonDown(1))//右ボタンが押された時
{
transform.position = startPos;//初期位置に戻す
//テクスチャ変更
if(iTexNum == 0)
{
iTexNum = 1;
myRenderer.material.mainTexture = texture1;
myRenderer.material.color = Color.white;
}
else
{
iTexNum = 0;
myRenderer.material.mainTexture = null;
myRenderer.material.color = Color.red;
}
}
}
}
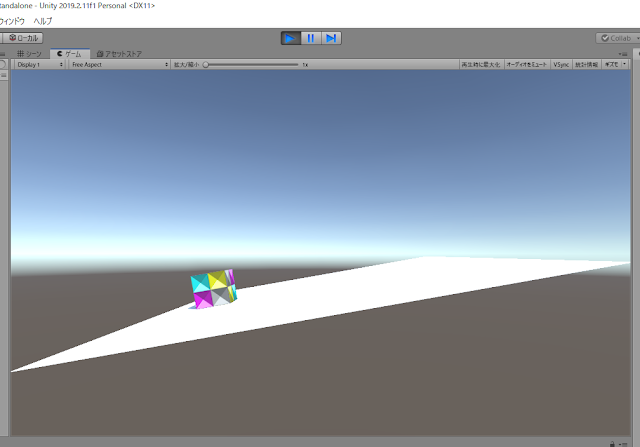
4.実行結果
右クリックでキューブのテクスチャが変更される
■参考文献
見てわかるUnity2019C#スクリプト超入門


0 件のコメント:
コメントを投稿